Sunday, October 7, 2012

Imagine, Create, Inspire


Hello Everybody!

I hope you are all having a fantastic Sunday!

 I wanted to share with you one of the projects I created while I have been away. Any guesses what it is? LOL If you said art journal you are correct. I have been seeing all sorts of videos and tutorials on mixed media journal or art journals, and thought it looked like fun. Usually in my crafting I am pretty regimented and picky about things matching and being straight, so I thought this would be something a little more freeing. I have done 3 pages so far and I am in love with it. I absolutely love the freedom and the liberation of not having rules. Yes in my world there are crafting rules! LOL I cant help it!

For this page, I used minimal supplies. Just some gesso, spray inks from Lindy's Stamp Gang, modeling paste and some stamps and paper from my stash.


Above is the overall page
Posted by Picasa


I did not use scissors on any portion of this page. Everything was ripped my hand.


The sky was made using modeling paste and spray inks.

If you have thought about starting an art journal I would say go for it. I am finding it very fun, liberating and it allows me to used supplies and mediums I might not try with my normal projects.

Thanks for stopping by!
Sarah


Saturday, September 8, 2012

Finished Altered Box with Mini Album

Hello All!

It's finally finished! I have been working on this altered box for awhile so here it is all completed.I am super happy with how it turned out. I apologize it has taken so long to get the post up but my internet has been cranky, especially when trying to link in the YouTube video. All is well now,so lets get to the pics!


 Above is the completed version of the box lid. I added another cluster of flowers to the upper right corner and a small tag cut out from the paper collection.


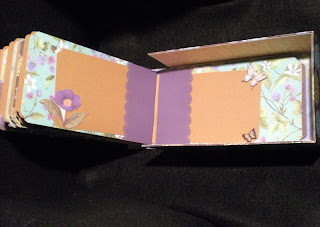
 This is the completed mini album. I reassembled it into an accordion style mini and covered it with coordinating paper from the collection. I kept the embellishments simple because the paper was so pretty and just needed some highlighting. The mini turned out to be 9 pages!

Below is the YouTube video I did that walks through box and the mini.


Thanks for watching and following along while I completed this. It was a lot of fun and I can't wait to alter something else!

Bye for now!
Sarah


Monday, September 3, 2012

Trims, Lace and Flowers - Altered Box Part 3

Happy Labor Day Everyone!

I hope you are having a great 3 day weekend! I have been diligently working on the box and mini that's inside. Its a little slow going since I have been making most of the embellishments myself. But I'm having fun and that's what counts!


Since I was going with the shabby chic look, my mind immediately went to lace and this trim for the edge of the lid. I bought the pink trim at Jo Ann's over a year ago but I checked yesterday, and they still carry it. I love how it looks! I used my hot glue gun and attached the lace first and then hot glued the trim over it.


Also in the trim aisle at Jo Ann's I found this wonderful flat back pearl trim. I admit I went crazy and bought all they had. I couldn't help myself LOL! Using my Glossy Accents, I put a dot of glue on each pearl and laid it as close to the edge as possible. It really finished of the edge nicely against the flowers and lace on the side.


To cover up the hole in the corner ( you see it in above picture) I decided that flowers would be perfect. The 2 larger ones in the center are made from ribbon I coiled and attached to a paper circle using hot glue. For the dark grey one, the center is a Recollections embellishment I got at Michael's  The rest are using a punch and then embossed with UTEE. Brads finished them off for a cute center.


All together now, this is the box. I'm thinking just a few more embellishments and the box will be finished and then its full speed on the accordion mini inside. Not sure what I have planned there but the joy is in the journey, right?

Thanks for stopping by!
Sarah

Friday, August 31, 2012

And the Altered Box is covered!

Hello All!

Whew! I have been a crafting nutcase the past few days. I am working really hard to finish the outside of the altered box project. Its been going really well and I cant wait to show you all the progress.

Here it goes! 


This is the chip board accordion piece that I showed in an earlier post. I have cut it apart into individual sheets and gesso'd it. The reason for cutting it was that it seemed to be held together with masking tape that was getting brittle. I didn't want the project to be flimsy so I decided to separate them. I can always put it back to an accordion with new hinges!


Here is the paper collection I am using to make this project. It is by Iron Orchid and called Loolah. I bought it at the Scrapbook Expo. Its a 6x6.75 inch pad and is the perfect size for this project. I love using a smaller pad for this instead of trying to cut down a 12x12. I feel you lose to much that way in regards to the paper pattern and look. 


Above is the side of the box. To get more of the white wash look, I used my finger and LIGHTLY smeared some more gesso on the paper and around the edges to soften the look. I absolutely love how it turned out!!


Last but not least is the top of the lid. I really like this pink paper. Its hard to tell in the picture but it has a damask look to it in pink tones. 

So far this is the progress. Slow going but I wasn't to sure what I was aiming for when I started! LOL After fiddling I am leaning toward a shabby chic look. I think its off to a great start! 

Thanks for following this project. Keep checking back in to see how its going!

Have a great night!
Sarah 

Tuesday, August 28, 2012

Altered Box Project

Hello all!

This is a new project I am bringing you. Its is a small box that I am going to alter and create some sort of mini or tags to go inside. What I would like to do is to show you the steps I am taking and kind of how I am doing it. I have never altered anything really so I though it might be fun to see the project in stages through photos. I started last night so I am not behind yet LOL I did however, have this brilliant idea after I had already gesso'd the box, so please forgive me! 


Here is my starting point. Its an accordion fold chipboard piece, the box it fits in (below), and white gesso by Artist's Loft. 


After I painted the box with the gesso, this is what it looked like. It was originally the same color as the accordion piece.

So far, that's all I have done. Did I mention that I started about 1 in the morning? LOL So stay tuned, there is a lot more to share!

Thanks for popping by!
Sarah


Sunday, August 26, 2012

30th Birthday Layout


Hello Again!

I'm not sure what I was thinking, but I decided that one fair entry wasn't enough, so I decided to enter a layout as well. After thumbing through many idea books, magazines, and Pintrest, I combined about 3 different ideas, and this is how it came out. I will keep you posted on both entries and let you know how it goes. 

Thanks for stopping by! 

Sarah 

P.S. Sorry the picture isn't as detailed as normal. It was a lot harder than I thought to capture the whole layout!!

Olde Curisosity Shoppe Card


Hello Everyone!

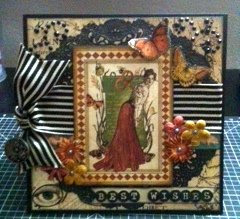
Below is the card I created to enter into my local fair. It is a 6x6 card with a black card stock base.  The decorative papers are from Graphic 45's Olde Curiosity Shoppe collection. The rest of the accents were odds and ends from my stash. I am super excited about how it turned out! The next week is going to be agony waiting for the fair to open and see how I placed. I will keep you posted on results!


The charm above, is from Michael's. It is part of their Bead Landing collection. I absolutely love how the clock is deconstructed to see the inner gears. It finished the card beautifully! 

Thanks for stopping by!
Sarah 

Thursday, August 23, 2012

Embossed Art Tag


Hello All!

This is my most recent creation. A tag using some Tim Holtz stamps I got recently at my Jo-Ann's (on clearance no less!). I have been wanting to experiment and play with all of my supplies for some time now, but I have a hard time just letting myself go and not following a pattern LOL. Its a trait of mine that usually comes in handy (as a medical assistant I have to be VERY precise) but when it comes to creating, its a bit hindering. So for the past few weeks, I have been trying to push myself to just wing it. No sketches (unless I draw them), no patterns, and no running out to buy anything unless I run out (adhesive).

For the tag, I love the quote, which reads, " Creativity is allowing yourself to make mistakes. Art is knowing which ones to keep." I find it very inspiring and wanted to make something to hang in my space with it. Since space is limited, I thought a tag was the way to go. I tried to use a variety of techniques such as misting, embossing, layering and distressing. All things I have done but not usually all on the same project. I really like how it came together, and it was fun to make. I am definitely going to make more to see what else I can come up with. This is only the beginning!

Stay tuned, I have another project to show you either later tonight or tomorrow depending on when I put the finishing touches on!

Thanks for stopping by!
Sarah :)

Monday, August 20, 2012

A Mixed Media First


Posted by Picasa
 My very first mixed media project. I am so happy with how it turned out and I cannot wait to do some more! Where did I get the idea you say? From YouTube! On one of the channels I follow, Jennings644, I saw an amazing heart tag. I love all the texture and color!After watching the video (and a few others) I decided I absolutely, positively HAD TO make one! So it was off to the craft store, to get some modeling paste and knives so that I too could create one. After my shopping spree, while some accents for another project were drying, I got out all the goodies and tried my hand at a tag. I did have some trouble with the UTEE and it not wanting to cover the heart. It took a lot of finesse, but I think it worked!

Thanks for stopping by!
Sarah


Saturday, August 18, 2012

First YouTube Video

Well its out there! LOL I just completed my first YouTube video. I didn't realize it but I do not like speaking on camera. I don't know why, since I have no problem teaching or with public speaking, but on camera is a different story. In the video, I showcase the Vintage Disney Suitcase that I finished. It was on my blog a few days ago but I want to start making videos, and I though that would be a good one to start with.


Please watch, leave a comment or 2 and let me know what you think!

Monday, August 13, 2012

Vintage Disney Suitcase


Posted by Picasa

Here it is! The Vintage Disney Suitcase! Finally its a complete box, decorated, also a piggy bank (the slot is under the handle) and holding some savings for our trip to Disneyland for Halloween. It constructed from foam board, card stock and LOTS of glue, ink and glimmer mist! The small icons are stamps of Mickey Mouse images, giving it kind of a Louis Vuitton feel. The only thing missing is a luggage tag and that will be completed tomorrow! I am really, really happy with how it all came together. As you may recall, this was something completely from my own imagination that I brought into reality. 

Once I get the luggage tag complete, I will post more pics, including some close ups. I hope this inspires you to create something that has been living in your imagination! 

Saturday, August 11, 2012

Accessories for Vintage Disney Suitcase

Here are some pics of 2 of the accessories I made for my Disney Vintage Suitcase. The first one is the side straps. I have taken Tim Holtz grunge paper and used ink and glimmer mist to get it that vintage leather look ( bottom pic shows color better). The Mickey icon is just 3 brads from a pack I had in my stash.


The second accessory is the luggage handle.  Again its grunge paper, distressed to look like leather. This is a better picture to show the coloring.


Enjoy and please keep checking back. The suitcase is almost finished and I cant wait to show you!
Posted by Picasa

Monday, August 6, 2012

Scrappy Key Chain


This is something I put together from a free make and take at the Scrapbook Expo. Inside the top square piece, is the clear 1x1 glass tile that I created at the Expo. It was at the Craft Fantastic booth. You picked an image ( it says scrap diva) and then using something similar to glossy accents, adhered it to the back of the tile. I love how it came out! Afterwards, I immediately thought that it would make an awesome key chain.

 At the booth, they were not selling individual holders, so it took me a few weeks, but at my local scrap store, I found some Ranger metal frames that were perfect. Once I had the frame, it was off to Michael's. Tonight I found the perfect additions. They are the art charm and the crown, from the Art-I-Cake line. The A is wooden, similar to a Scrabble tile, the T is similar to a ceramic tile and the R uses the same technique I used to make the large tile. 


I am so excited with how it turned out. Who knows, I might be adding charms to everything now! This is now proudly on my key ring and it will inspire me everywhere I go. 


Posted by Picasa

Tuesday, July 31, 2012

Almost a Box


Posted by Picasa

Almost built! This is the box (missing the final side) that will become a Disney piggy bank/ vintage suitcase. I am using foam board at the recommendation of the boyfriend. Apparently chipboard wasn't sturdy enough for him! LOL So far this has been a slow process. I have no pattern, no measurements, etc. Basically I have been flying by seat of my pants and loving every minute of it! By the end of today I am hoping to get the other side on, covered and then start altering the patina. I am aiming for the look of aged leather and aged hardware.

Stay tuned, there is lots more to come!

Saturday, July 28, 2012

On the Horizon

Whew! It has been a crazy, CRAZY few weeks! The good news is that I can now completely focus on what I love the most, CRAFTING! 


It started last weekend when the Scrapbook Expo was in town. I spent all day Saturday there checking things out and shopping up a storm. I found some amazing stamps from The Rubber Cafe, lots of trim from Tall Mouse and lots of other goodies from various other vendors. I would recommend that if Scrapbook Expo is in your area you check it out!


Today I did another trip to my local scrapbook store and loaded up on paper. I have been DYING to work with Graphic 45 collections! On my list was Olde Curiosity Shop, A Ladies Diary, and Kraft Reflections. Unfortunately the shop did not have any in a 12x12 pack so I had to piece together Olde Curiosity Shop (I hope I have them all) and was only able to get a few Kraft Reflections(that I will order online). As for A Ladies Diary, I was able to get the 8x8 pad which is perfect because I envision tags and gorgeous cards! I also stocked up on scor-tape because I use it for everything!


Now that I am stocked up, its on to the projects. I have so many swirling in my brain its nuts! First I am going to make a Disney suitcase that will double as a mini album holder and a piggy bank. Then I want to make another album in a box for my sister who is in LOVE with the Olde Curiosity Shop collection. After those two I am thinking its time to finish some UFOs (unfinished objects), of which I have a bunch! There is a Halloween mini, my Tim Holtz
Destination Unknown mini, and about 300 pictures that need layouts. I also want to organize a card swap, possibly a tag swap, and get my holiday cards going. WHEW, Im tired just thinking about it! 


SO KEEP CHECKING IN! I will post pictures of during and after of the projects and PLEASE leave comments. I am dying to hear feedback from you guys! 

Saturday, July 14, 2012

Hello Doggie Card

Here is my latest creation! I made this for my sister, who like me, is a dog lover. All of the paper is from my stash and the stamp set is from the current Close to My Heart catalog.


The card base is cream. The dark brown and reddish orange are layered and sized to show about an 1/8 border on all sides. The dog is stamped on another piece of cream in brown Stazon. I then colored it with Bic Mark It permanent markers. To get some of the lightness around the mouth and ears, I went over the permanent marker with the Copic blending marker to leach out some of the color. Before I glued the red/orange piece down, I wrapped it with hemp twine and tied the knot. Then with pop dots, I popped up the thought cloud over the twine for some dimension.


Here is a great tip to get started using permanent markers to color your stamped images. Start out using the Bic Mark Its ( I got mine at Wal-Mart) and just purchase the Copic blending marker. Experiment with shading and lighting areas and see what you come up with. Thats what I did here and I am thrilled with the results!

Enjoy and I hope this inspires you to get some markers and see what you come up with!
Posted by Picasa

Wednesday, July 4, 2012

Americana Card

Here is my final card for the 4th. To begin, I made a cream card base then covered it with the navy star paper which is from Jo Anns in their by the sheet bins. I then cut the cream strip that runs down the middle and hand stiched with embroidery thread the zig zag  strips in red. The red star print is from the Bo Bunny LIbery Collection. Then I stamped another cream piece with a firework stamp in red and navy blue and embossed them with clear detail powder. The flag is also a stamp on cream cardstock, cut out and then covered with coordinating glitter glue. The red scallop strip is cream with red spray ink. The frame is navy blue and tied with the same twine I stitched in.


Posted by Picasa

Out of all that I made this is my favorite( and took the longest)!

Have a wonderful 4th!

Friday, June 29, 2012

USA Card

Here is the second card I created for the 4th of July. Because it doesnt say 4th of July specifically it could also be used for anything patriotic. This uses the Bo Bunny Liberty collection as well as navy cardstock from my stash. With my Cricut I cut out the letters and the stars. White card stock is the base and then I inked the red and blue pieces with Close to My Heart inks. I then added corrosponding glitter glue to the stars and Glossy Accents to the letters so they would stand out.


For the inside I cut a square piece of cream and inked it in red. The stamp is by Studio G. To get the multi colors in one stamping, I inked the colors onto the stamp sections using my sponge daubers.


I hope you enjoy and it inspires you to get creative for the summer holiday!
Posted by Picasa

Thursday, June 28, 2012

Patriotic Card

This is one of three patriotic 4th of July cards I made this year. This one is using the Bo Bunny Liberty collection and stamps from Close to My Heart and Studio G. There is also embossing on the front centiment although it doesn't show in the photo.


Posted by Picasa

Thursday, May 24, 2012

Mothers Day Project

This past month has been amazing! I was able to spend 12 days at home in California and was able to meet my nephew for the first time. Let me just say he is the most wonderful little baby ever!!! Since I was home and it  just happened to be Mothers Day, I made my mom this adorable mini album in a box. I love it because you really get to showcase the papers with the box construction and it provides a great home decor piece. This looks wonderful on a coffee table or displayed on a book case. As an added bonus, it keep the photos stored away from dust and light.


Above is a side view of the box and lid.


When you take the lid off, you see the paper bag mini album inside. If you look closely you will see that the right side of the box is only attached to the base of the box.


Because the side is not attached, it allows the spine of the album to lay flat with the base of the box. This gives you the illusion of  a book and allows you to
 flip through the album easily.
I must give credit to Kathryn at Life on the Scrap Beach (http://thescrapbeach.blogspot.com/) for creating this wonderful project and making the pattern available for purchase. The paper collection and embellishments I used were K & Co and the paper bags are the Celebrate It brand from Michaels. The solid card stock was just out of my stash. The Live, Laugh, Love stamp is from the current Close to My Heart Catalog.
Posted by Picasa

Friday, April 20, 2012

Birthday Flowers Card


Here is a birthday card I made for a friend this past weekend. To my suprise I didnt have a birthday sentiment stamp, so I just made a fun card front instead. Knowing that she loves flowers and bright colors, I layered some punched flowers out of the Mango Frost 4x6.5 mat stack by Die Cuts With a View. In the middle each flower is a rhinestone. Along the bottom I layered some strips from the same stack and added a punched border for some flair. The stems are stamped and the butterflys were colored with inks to coordinate with everything. For the inside I used some corrdinating markers and pens from Martha Stewart and handwrote my sentiment and message.
Posted by Picasa