This past month has been amazing! I was able to spend 12 days at home in California and was able to meet my nephew for the first time. Let me just say he is the most wonderful little baby ever!!! Since I was home and it just happened to be Mothers Day, I made my mom this adorable mini album in a box. I love it because you really get to showcase the papers with the box construction and it provides a great home decor piece. This looks wonderful on a coffee table or displayed on a book case. As an added bonus, it keep the photos stored away from dust and light.

Above is a side view of the box and lid.

When you take the lid off, you see the paper bag mini album inside. If you look closely you will see that the right side of the box is only attached to the base of the box.
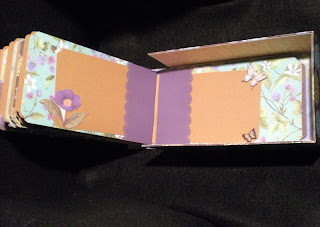
Because the side is not attached, it allows the spine of the album to lay flat with the base of the box. This gives you the illusion of a book and allows you to
flip through the album easily.
I must give credit to Kathryn at Life on the Scrap Beach (
http://thescrapbeach.blogspot.com/) for creating this wonderful project and making the pattern available for purchase. The paper collection and embellishments I used were K & Co and the paper bags are the Celebrate It brand from Michaels. The solid card stock was just out of my stash. The Live, Laugh, Love stamp is from the current Close to My Heart Catalog.


